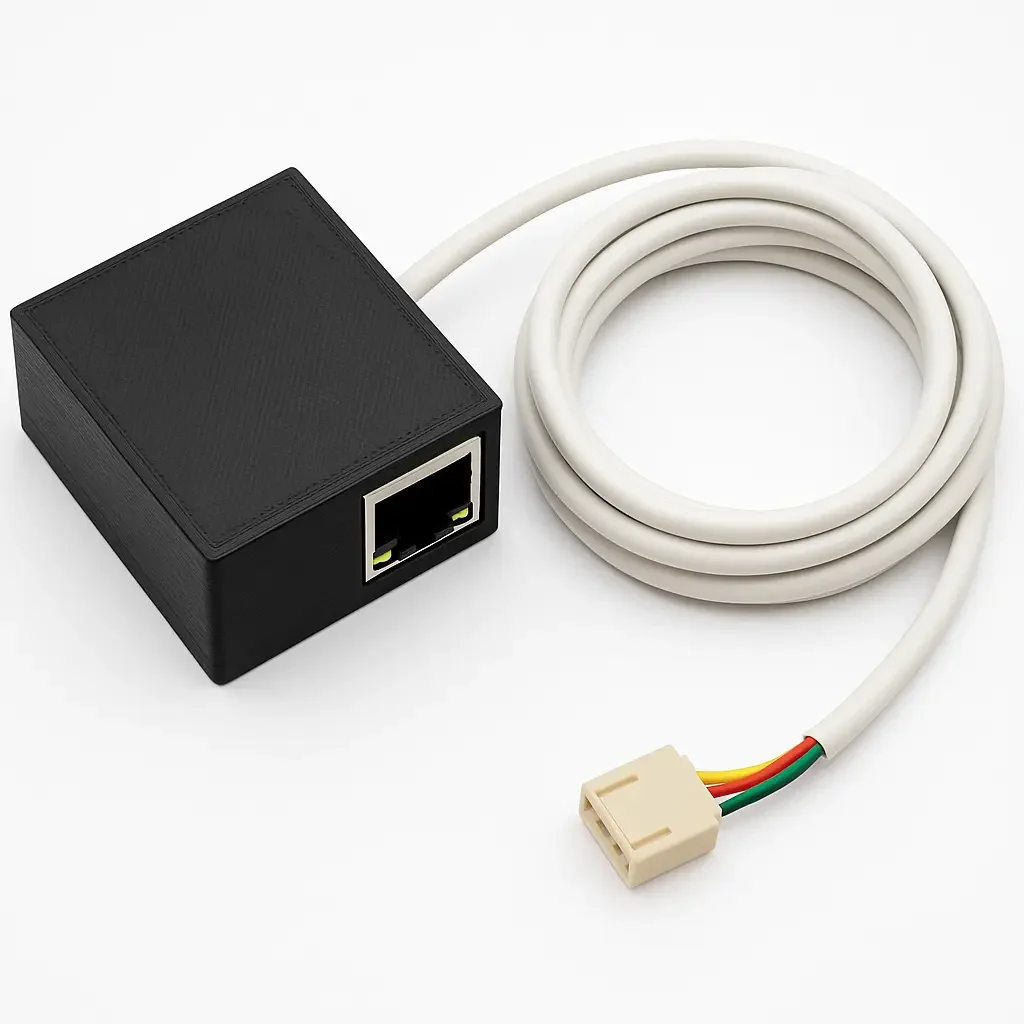
Contents
- Part 1: First-Time Setup
- Part 2: Logging In to the Admin Portal
- Part 3: The Configuration Page (Main Dashboard)
- Part 4: Guest Access Codes
- Part 5: The Web Keypad (For Your Guests)
- Part 6: Ask Locki — Your AI Assistant
- Part 7: Settings Page
- Part 8: Integration into an Existing Home Assistant Server
- Part 9: Installing LocknAlert as an App
- Part 10: Warranty
- Quick Reference
What is the LocknAlert Admin Portal?
The Admin Portal is a page that lives on your LocknAlert device. You open it in a web browser — no app to install, no internet needed. From here you can change your Wi‑Fi, set up your alarm panel, connect to Home Assistant, keep an eye on how the device is doing, hand out temporary codes to guests and helpers, and ask Locki — the built-in AI assistant — whenever you're stuck.
No cable nearby? Run it over Wi‑Fi instead. If your LocknAlert is not plugged into your router with a cable, it will start up in setup mode and create its own temporary Wi‑Fi network so you can tell it your home Wi‑Fi details.
-
1Power on the devicePlug in your LocknAlert and wait about 20–30 seconds.
-
2Connect to the LocknAlert setup networkOn your phone, tablet, or laptop, go to Wi‑Fi settings and connect to the network called
LocknAlert-Setup. There is no password. Your device may show “No Internet” — that’s fine and expected. -
3Open the setup pageOpen your web browser and type this into the address bar:
http://10.42.0.1:8080. You’ll see a simple page asking for your home Wi‑Fi details. -
4Enter your Wi‑Fi
- Network Name — type the name of your home or office Wi‑Fi exactly as it appears in your Wi‑Fi list.
- Password — type your Wi‑Fi password. Take care with uppercase letters and numbers.
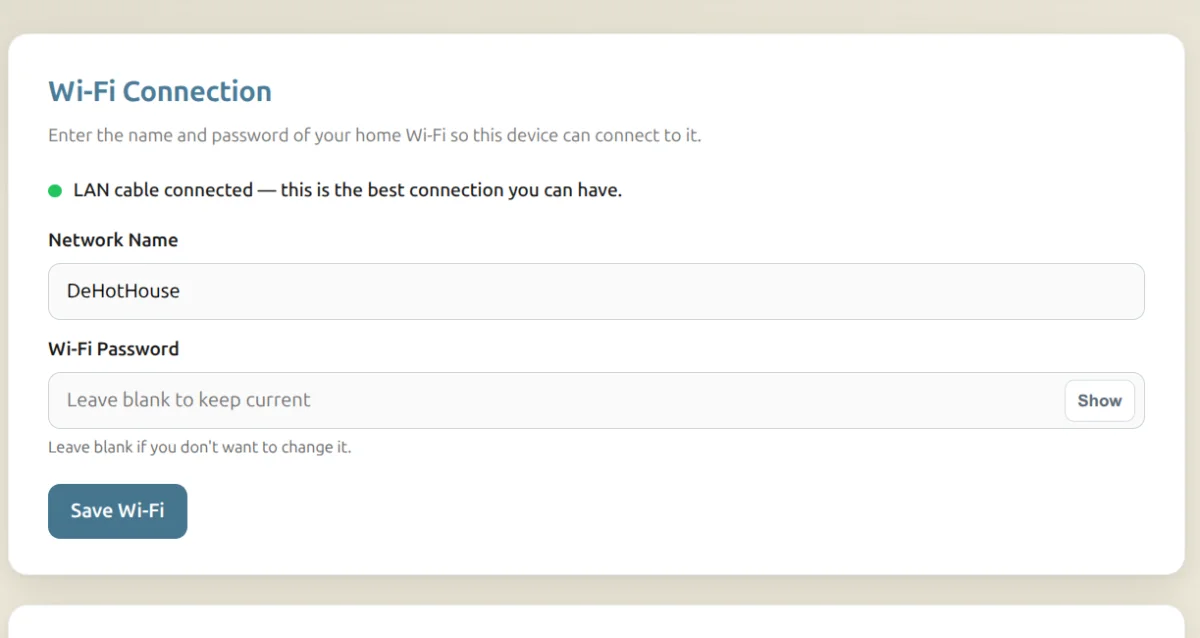
The Wi‑Fi setup page
Once your LocknAlert is on your home network (either by Wi‑Fi or cable), you can reach the Admin Portal from any phone, tablet, or computer on the same network.
Open your browser and go to: https://locknalert.local
You will see a security warning. This is normal. LocknAlert uses encryption (HTTPS) to keep your connection private, but because it’s a local device — not a website — your browser can’t verify it the usual way. You are not going anywhere dangerous. As long as you typed the address correctly and you’re on your own home network, it’s safe to continue.
- Chrome: Click Advanced → Proceed to locknalert.local (unsafe)
- Safari: Click Show Details → Visit Website (you may be asked for your Mac password)
- Firefox: Click Advanced → Accept the Risk and Continue
adminpassword123After logging in you land on the Configuration page. This is the main screen. On a phone you’ll see a top bar with a menu button (☰). On a tablet or computer you’ll see a side menu on the left.
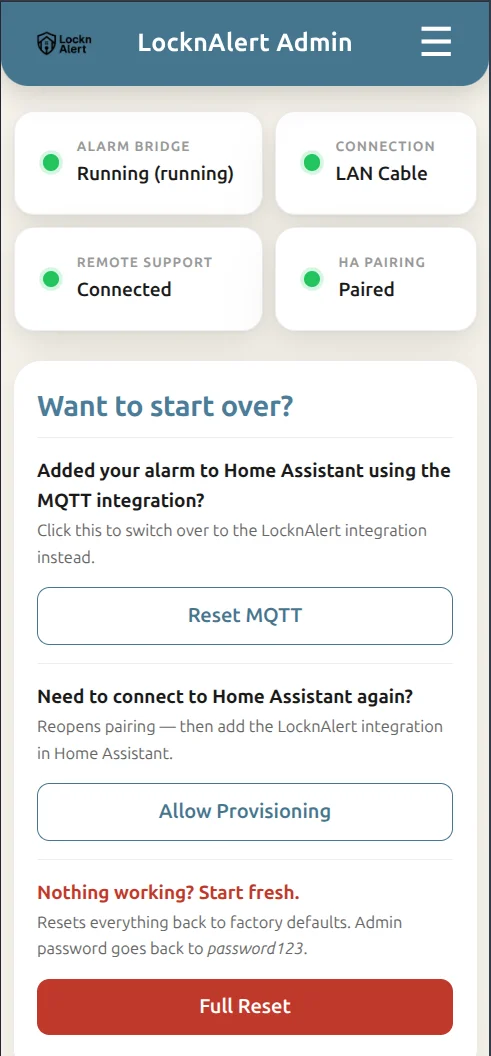
The Configuration dashboard
Status Tiles
At the top of the page are four tiles that show you how everything is doing at a glance. Each one has a coloured dot:
- Green — working
- Yellow — not set up yet, or waiting
- Red — something is wrong
Tap or click any tile to see more detail.
At a Glance
Below the tiles is a row of quick numbers: how long the device has been running (Uptime), how many devices are paired to it, how many alarm zones are currently active, and when it last synced. Handy for a quick health check without opening anything.
Recent Activity
A live list that updates every 30 seconds, showing the latest guest access-code activity (someone armed or disarmed with a code, a code got locked out, a code expired) together with any alarm-bridge problems the device has spotted. A coloured dot shows what kind of event it is, and where the AI assistant, Locki, has already worked out what's wrong, its plain-English explanation shows up right there — so you often already have the answer before you'd need to ask.
Quick Actions
A shortcut card with the same three reset buttons described below (Reset MQTT, Allow Provisioning, Full Reset), so you don't need to scroll to find them.
| Tile | What it shows |
|---|---|
| Alarm Bridge | Whether the LocknAlert is talking to your alarm panel |
| Wi‑Fi / Connection | Which network the device is on, and signal strength. Tap to change your Wi‑Fi |
| Remote Support | Controls whether LocknAlert can connect to your device remotely to install updates and new software |
| HA Pairing | Whether Home Assistant is connected to this device |
Alarm Panel Settings
This is where you tell LocknAlert about your alarm panel.
- Panel Type — Choose the type of Paradox alarm panel you have. If you’re not sure, leave it on EVO (default).
- Panel Password — The installer password for your alarm panel. The factory default is
0000for most EVO panels. If you’re not sure, ask your installer. - IP Module Password — Only needed if you’re using the LocknAlert as a network module for Babyware or Winload. Leave this blank if you don’t know what it is.
Click Save Alarm Settings when done.
If the alarm bridge stops or you make a change and it doesn’t seem to take effect, click Restart Alarm Bridge to restart it.
Home Assistant Settings
- Arm / Disarm Code — A number you type before arming or disarming your alarm in Home Assistant. Leave it blank if you just want to arm/disarm with one tap — no code needed.
Click Save HA Settings when done.
Alarm Bridge Status (tap the Alarm Bridge tile)
Tapping the Alarm Bridge tile opens a detailed view. It shows you whether the bridge is running, and gives a plain-English diagnosis if something is wrong — for example “Wrong Panel Password” or “Can’t find the USB cable.” This diagnosis is written by Locki, the AI assistant, so it usually already tells you what to try before you'd need to call your installer. There’s also a live log and a history of past issues at the bottom you can share with your installer if they ask for it.
Wi‑Fi (tap the Wi‑Fi tile)
Tapping the Wi‑Fi tile opens a pop-up that shows your current connection and signal strength. At the bottom of that pop-up there’s a form where you can change your Wi‑Fi network — type in the new network name and password and tap Save & Connect. You can also change Wi‑Fi from the Settings page (see Part 7).
Remote Support (tap the Remote Support tile)
This controls whether your installer can connect to your device remotely — for support, troubleshooting, or to install updates — without you needing to be there. It's off by default privacy-wise until you switch it on, and you can switch it off again at any time; your alarm panel and siren are completely unaffected either way. If the tile shows “Not installed”, this feature simply isn’t set up on your device yet.
Home Assistant Pairing (tap the HA Pairing tile)
This shows whether Home Assistant is currently paired with the device. If you need to re-pair — for example after reinstalling Home Assistant — tap Allow Provisioning here, then add the LocknAlert integration in Home Assistant. This pop-up also warns you if Home Assistant's own MQTT settings are pointed at the wrong place, in which case use Reset MQTT below before trying to pair again.
Want to Start Over? (Reset Options)
Near the top of the Configuration page there’s a section with three reset options. Only use these if something has stopped working.
| Button | What it does |
|---|---|
| Reset MQTT | Switches the alarm bridge back to the device’s built-in connection. Use this if you previously connected it to an external MQTT server and want to go back to using the LocknAlert integration in Home Assistant. |
| Allow Provisioning | Re-opens the pairing window so Home Assistant can connect again. Use this if you need to re-pair. |
| Full Reset | Wipes everything back to factory defaults — including your admin password, which goes back to password123. Use this only as a last resort. |
Advanced Settings
Click Access Codes in the menu. This is where you create temporary PIN codes for anyone who needs to get in without knowing your main alarm code — an Airbnb guest, a cleaner, a gardener, or your armed response company.
Creating a Code
Choose the type of code that fits the situation:
| Code type | Best for | How it behaves |
|---|---|---|
| 📅 Date Range | Airbnb / short-term guests | Only works between the check-in and check-out dates you set. Works for arming and disarming, guest's choice, the whole time it's valid. |
| 🔧 Service Visit | A once-off visit (gardener, technician, armed response) | Works exactly twice: first entry disarms, second entry arms again — then the code stops working on its own. No need to remember to revoke it. |
| 🔑 Permanent | A recurring helper (regular cleaner, housekeeper, gardener, armed response) | Never expires and can be used any number of times. Remember to revoke it yourself once it's no longer needed. |
-
1Pick a code typeFor Service Visit or Permanent codes, also pick who it's for (gardener, cleaner, armed response, etc.) from the drop-down that appears.
-
2Add a label (optional)Something to help you remember who this is for later, like “Sarah – Airbnb guest” or “John the gardener.”
-
3Add their WhatsApp number (optional)Type it with the country code, e.g.
+27821234567. If you fill this in, the code is sent to them automatically over WhatsApp the moment you create it — no need to copy and send it yourself. -
4Click Generate CodeA 10-digit PIN appears on screen, once. Copy it with the Copy Code button if you're sending it yourself.
Managing Codes
Every code you've created is listed in a table, with its label, type, and status. The actual code is never shown again — you'll see dots instead. From this table you can:
- Revoke — switches the code off immediately. Use this the moment a guest checks out or a helper stops working for you.
- Unlock — only appears once a code has failed 5 times in a row (someone kept typing it wrong). Tap this to reactivate it, or leave it locked if you're worried someone's trying to guess it.
Older codes that have been revoked, expired, or fully used move into a Code History list further down, and every attempt — successful or not — is recorded in the Access Audit Log so you can see exactly who came and went, and when.
Kept Safe Automatically
You don't need to do anything for this, but it's worth knowing: if someone tries the wrong code 5 times in a row, that code locks itself. If someone tries and fails 10 times from the same phone or computer, that device gets blocked from trying again for 2 hours. Guessing your way in isn't realistic.
This is the page your guest actually uses — they don't log in to the Admin Portal at all, and they don't need to install anything. If you sent their code over WhatsApp, the message already includes a link straight to it. Otherwise, share the keypad address your installer set up for your device.
On the page, your guest will see:
- The current alarm status (Disarmed, Armed, etc.), updating automatically.
- Four buttons for what they want to do: Disarmed, Armed Home, Armed Night, or Armed Away.
- A number pad to type their code, then a big button to confirm.
They pick what they want to do, type their code, and tap the button. A full-screen confirmation shows if it worked. If the code is wrong, expired, or not valid yet, they'll just see “Invalid or expired code” — it deliberately doesn't say which, so no one can use the error message to guess their way in.
Locki is a built-in AI assistant that can answer questions about the portal and help you understand what's going on with your alarm bridge — in plain English, any time, without needing to phone your installer first.
You'll find Locki in two places:
- A chat bubble in the bottom-right corner of every page — tap it to ask a quick question without leaving what you're doing.
- A full Ask Locki page in the menu, for a bigger chat window.
Just type your question in plain language — things like “How do I add a guest code?” or “Why does it say wrong panel password?” — and tap Ask. Locki also works quietly in the background: if it spots a problem with your alarm bridge, its explanation is often already waiting for you in the Alarm Bridge status pop-up or the Recent Activity list before you even ask.
Click Settings in the menu to get to the Settings page. This is where you manage the device itself.
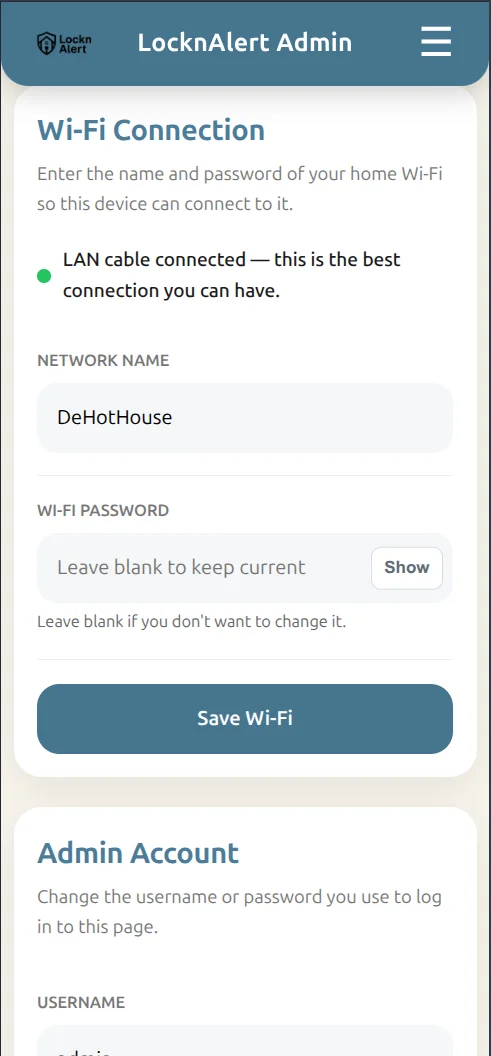
The Settings page
Wi‑Fi Connection
Shows your current connection status at the top. If the dot is green, you’re connected. If it’s red, the device isn’t on Wi‑Fi (which is fine if it’s plugged in with a cable — it will say “LAN cable connected”).
To change your Wi‑Fi network:
- Type the new Network Name (your Wi‑Fi name exactly as it appears).
- Type the Wi‑Fi Password.
- Click Save Wi‑Fi.
The device will connect to the new network. Give it about 30–60 seconds, then reload the page.
If the signal strength warning appears (“Weak signal — an ethernet cable gives a much more reliable connection”), consider using a cable instead.
Admin Account
This is where you change the username and password you use to log in to this portal.
- Username — change this if you want to use something other than “admin”.
- New Password — must be at least 8 characters. Leave blank if you’re not changing it.
Click Save Account when done.
password123) is the same on every LocknAlert device.
WhatsApp Alerts
Add phone numbers here to be notified over WhatsApp if something goes wrong with your alarm bridge — a fault, a disconnected panel, anything that needs attention. Each alert includes Locki's plain-English explanation of what happened and what to do about it.
This is separate from sending a guest their access code (see Part 4) — this list is for you (and anyone else you choose) to be told about problems, not for letting people in.
- Type a WhatsApp number (with country code) and, optionally, a name, then click Add Number.
- Click Remove next to a number to stop sending it alerts.
Home Assistant Pairing
Shows whether Home Assistant is currently paired. If you need to re-pair — for example if you reinstalled Home Assistant — click Allow Provisioning, then go to Home Assistant and add the LocknAlert integration.
Restart Device
Reboots the LocknAlert device. Home Assistant will lose connection for about a minute during the restart. Your physical alarm panel keeps working normally throughout.
Help
Click Take the Tour to replay the short welcome walkthrough you saw when you first logged in — handy if you want a refresher, or want to show someone else how the portal works.
There is a custom GitHub HACS integration written to handle integration of the LocknAlert Bridge into Home Assistant. See here for how to install HACS if it isn’t installed yet.
In HACS, click the three-dot menu in the upper right and select Custom repositories. Paste the following URL: https://github.com/LocknAlert-Pty-LTD/locknalert_mqtt, select Integration as the category, and add it. Search for LocknAlert MQTT in HACS and install it, then restart Home Assistant.
After the restart, if your network supports mDNS, Home Assistant will auto-discover the bridge. You’ll see it appear under Settings → Devices & services → Discovered.
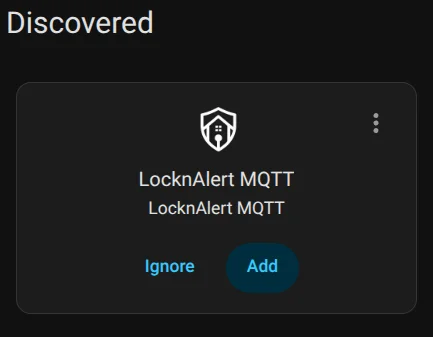
The discovered LocknAlert bridge in Home Assistant
https://locknalert.local and sign in. Click Allow Provisioning — if you try to finish setup in Home Assistant before allowing provisioning, it will fail with a “pairing required” error and you’ll need to come back and retry.
Back in Home Assistant, select the discovered LocknAlert bridge and click Add. The serial number is auto-detected from the network and pre-filled, you only need to enter it manually (from the bottom of the bridge, or the bottom of the admin portal page) if auto-detection didn’t work or your network doesn’t support mDNS, in which case add the integration manually instead (see below). Click Submit to complete setup — Home Assistant will provision a dedicated MQTT username and password for the bridge automatically.
Once complete, a new LocknAlert MQTT integration entry appears, with your Paradox alarm panel showing up as a device.
If the Bridge Isn’t Auto-Discovered
If your network doesn’t support mDNS, or the bridge doesn’t show up under Discovered after a minute or two, add it manually instead:
- In Home Assistant, go to Settings → Devices & services → Add integration, and search for LocknAlert MQTT.
- Enter the Broker field — the hostname or IP address of your LocknAlert bridge on your network (e.g.
192.168.1.50). - Enter the Bridge Serial Number (from the bottom of the bridge, or the bottom of the admin portal page). Otherwise setup will fail with “Bridge serial number is required.”
- Click Submit. As with auto-discovery, if the bridge hasn’t had provisioning allowed yet, this will fail with “The LocknAlert bridge requires pairing before it can be used” — go to the admin portal at
https://locknalert.local, sign in, click Allow Provisioning, then submit the form again.
Once it connects, Home Assistant provisions the MQTT credentials automatically and the LocknAlert MQTT integration entry is created, same as the discovery path.
Automation Blueprints
Ready-made Home Assistant blueprints are available at github.com/LocknAlert-Pty-LTD/HomeAssistantBlueprints. Install them to get notified why the alarm might not have armed, and to receive a notification whenever the alarm changes state showing what it changed to.
You can add the Admin Portal to your phone's home screen so it opens like a regular app, with its own icon and no browser address bar.
- Android / Chrome: You'll see an “Install LocknAlert” banner — tap it and follow the prompt.
- iPhone / Safari: Tap the Share icon, then Add to Home Screen.
If the device ever loses its internet connection, opening the app shows a simple “You're offline” message instead of an error — your alarm panel and siren keep working normally on their own the whole time; only the live status view is affected.
Register your warranty at register.locknalert.co.za/warranty/register. Completing the warranty registration ensures that we have the necessary information on record to process and honour any valid warranty claims efficiently.
| What you need | Where to go |
|---|---|
| First-time Wi‑Fi setup | Connect to LocknAlert-Setup → open http://10.42.0.1:8080 |
| Admin portal | https://locknalert.local |
| Change your Wi‑Fi | Settings → Wi‑Fi Connection (or tap the Wi‑Fi tile on Configuration) |
| Change login password | Settings → Admin Account |
| Alarm panel settings | Configuration → Alarm Panel |
| Create a guest / cleaner / gardener code | Access Codes → Generate Code |
| Guest's own keypad (no login needed) | The link sent with their WhatsApp code, or your device's keypad address |
| A code stopped working after 5 tries | Access Codes → Unlock (next to that code) |
| Get WhatsApp alerts if something's wrong | Settings → WhatsApp Alerts → Add Number |
| Ask a question / get help | Chat bubble in the corner (Ask Locki), any page |
| Replay the welcome tour | Settings → Help → Take the Tour |
| Pair with Home Assistant | Settings → Home Assistant Pairing → Allow Provisioning |
| Restart the device | Settings → Restart Device |
| Something broken? | Configuration → tap the Alarm Bridge tile → read Locki's diagnosis |
| Forgot your password | No web reset — contact your installer for device access |